
0%

Choosing Exterior Pier Mount Lanterns involves more than matching a fixture to a gate or porch. The lantern must manage weather, visibility, security, energy use, and architectural character. A charming design can still fail when its light shines into a neighbor’s window.

The U.S. Department of Energy reports that LED lighting uses at least 75% less energy and lasts up to 25 times longer than incandescent lighting. That finding makes LED compatibility an important selection point, not a minor upgrade. The 2024 Grand View Research outdoor lighting analysis also identifies energy efficiency, connected controls, and durable outdoor products as continuing market drivers. Still, market trends cannot replace site judgment. Measure the pier, check the mounting surface, and observe the entry after sunset.

Landscape-lighting authority Janet Lennox Moyer writes, “Light is the fourth dimension of architecture.” Her idea fits pier lanterns precisely. A lantern should reveal brick texture, walking edges, and the front door without flattening the entire façade. DarkSky guidance also encourages fully shielded fixtures and warmer color temperatures, especially where light trespass or wildlife concerns exist.

Look for corrosion-resistant aluminum, brass, or stainless steel. Confirm the fixture’s wet-location rating, mounting hardware, lumen output, color temperature, and replacement-part availability. A 2700K or 3000K LED often creates a welcoming appearance, but warmer is not always better. Dark brick, pale stone, and coastal air can change the result.

There is no perfect lantern.

The best choice balances proportion, comfort, maintenance, and responsible nighttime illumination. This guide examines those decisions with practical details, reliable sources, and a necessary reminder: attractive lighting can still be poorly aimed.
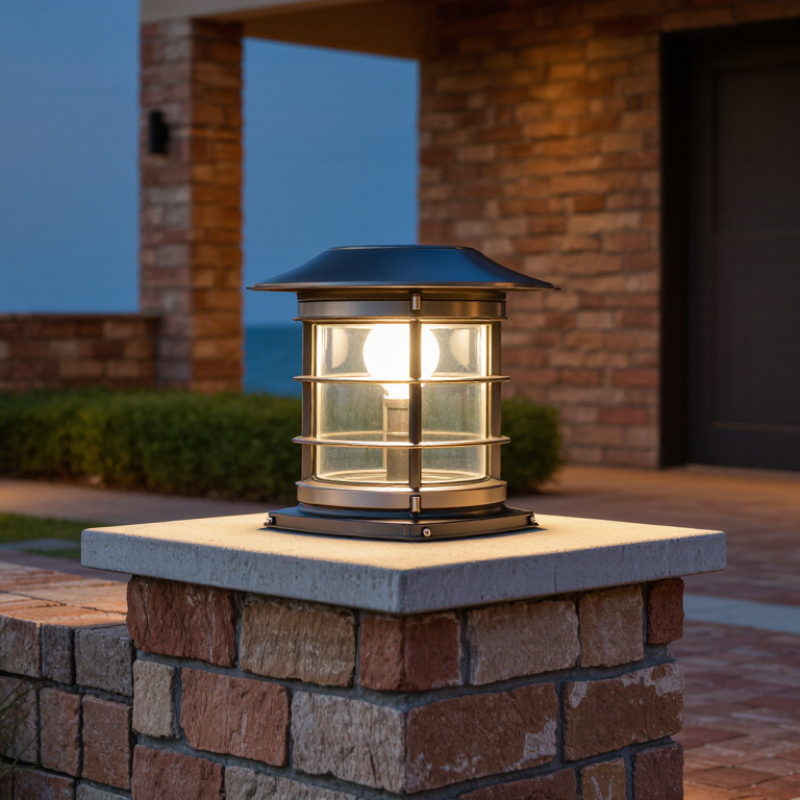
How to Choose Exterior Pier Mount Lanterns?

Define Pier Dimensions and Select a Lantern 25–33% of Pier Width

Choosing an exterior pier mount lantern starts with the pier, not the fixture. Measure the finished width, depth, and visible height after caps or trim are installed. A finished pier often looks wider than its structural core. That difference matters. I learned this after fitting a lantern to a narrow masonry column; it felt oversized from the driveway. Small mistake.

Use the finished pier width as your main reference. Select a lantern measuring about 25–33% of that width. For a 24-inch pier, a 6–8-inch lantern usually creates balanced proportions. Measure the lantern body, not only the mounting plate. Include decorative arms, roof overhangs, and side projections. A tall fixture can still look heavy if its cage is broad. Step back about 30 feet and view the entrance from the street. Look twice.

Height also needs practical judgment. The lantern should clear gates, vehicles, and hand traffic. Its light source should remain visible from normal approach angles. On a short pier, a compact lantern may look better than a dramatic tall model. On a broad entrance pier, the lower end of the range may appear lost. Weather exposure deserves attention too. Choose sealed construction and corrosion-resistant hardware. Match the installation method to the pier material. Confirm electrical requirements with a qualified professional. Measurements can be correct and still feel wrong. Recheck at dusk, when glare and shadows reveal problems daylight hides.

Choose Wet-Rated Fixtures Meeting UL 1598 and IP65 Protection Standards

How to Choose Exterior Pier Mount Lanterns?

Exterior pier mount lanterns face rain, dust, irrigation spray, and winter moisture. Choose a fixture specifically marked for wet locations, not merely damp locations. Wet-rated construction helps protect internal wiring when water can reach the lantern from multiple directions. Look for clear certification information connected to UL 1598, where applicable to your project and local requirements. The label should appear on the fixture or its documentation. Do not rely on a product photograph alone.

IP65 protection adds useful detail. The first number, 6, indicates dust-tight protection. The second number, 5, indicates resistance to water jets from any direction. IP65 does not mean the lantern can sit underwater.

Check the mounting cap, gasket, socket, and cable entry points closely. Small gaps around a pier can collect dirty water. That detail is easy to miss.

Measure the pier before ordering. Confirm the base footprint, bolt spacing, and available wire opening. A heavy lantern on a narrow masonry cap may look attractive but feel unstable. Select corrosion-resistant hardware for coastal or heavily salted environments.

A qualified electrician should verify grounding, connections, and weatherproof sealing during installation. One practical mistake is assuming a high IP rating compensates for poor installation. It does not. Recheck the seal after maintenance, because even a small misplaced gasket can invite moisture.

Match 2700–3000K Color Temperature with CRI 80+ for Exterior Visibility

When choosing exterior pier mount lanterns, light color deserves more attention than decorative shape. A 2700–3000K source produces warm light without making walkways look orange. That range can make stone, brick, and painted surfaces feel natural after sunset. It also supports comfortable visibility near gates, steps, and driveway edges. Keep it warm. In residential settings, I usually avoid very cool light because it can create a harsh, overly commercial appearance.

Color temperature alone is not enough. Look for a CRI of 80 or higher, especially around entrances and address plaques. Higher color rendering helps distinguish brown leaves, gray paving, and warning colors more accurately. CRI 80+ is a useful baseline, not a complete quality report. During installation checks, stand several feet away and inspect the light on wet pavement. Glare can hide detail, even when the lantern seems bright. A shielded or downward-directed design often improves practical visibility. I once judged a fixture by its lumen rating and ignored its beam spread. That assumption was wrong.

Measure the pier width before selecting the lantern, then compare its height with nearby railings. An oversized lantern may dominate a small entrance, while a tiny one can disappear beside broad masonry. Use a dusk test if possible. Check whether the 2700–3000K tone still reveals faces and surface changes from normal walking distance. Weather, dust, and aging lenses can reduce output over time, so easy cleaning and replaceable components matter. Specifications help, but the actual site can disagree.

Calculate 800–1,500 Lumens for Balanced Entryway Illumination

How to Choose Exterior Pier Mount Lanterns?

Calculate 800–1,500 Lumens for Balanced Entryway Illumination

For most residential entryways, 800–1,500 total lumens provides a practical starting range. Measure the paved area, then consider mounting height, wall color, and nearby lighting. A dark stone column absorbs more light than a pale surface. Keep the beam directed toward steps and locks, not drivers or neighbors.

That sounds obvious.

In my installation experience, one 800-lumen lantern can suit a narrow porch with limited surrounding light. A wider entry or deep porch may need about 1,200–1,500 lumens for more even coverage. Do not overlight. Excess glare can hide stair edges and make visitors uncomfortable.

Lumens are not the whole story. Clear glass can appear brighter, while frosted glass spreads light more gently.

Warm white light around 2700–3000K often makes brick and wood look natural, although personal taste still matters.

Check the lantern after sunset. Walk toward the door from the sidewalk. If your eyes squint, the fixture may be too bright or poorly shielded.

Choose construction suited to rain, dust, and seasonal temperature changes. An appropriate outdoor rating and sealed electrical areas improve long-term reliability.

One honest caution: lumen charts can overpromise. Fixture aging, dirty glass, and tree shadows reduce actual output.

Recheck the choice in winter. Snow and bare branches can change the scene.

Verify LED Efficiency Above 80 lm/W and Photocell or Timer Compatibility

How to Choose Exterior Pier Mount Lanterns?

Verify LED efficiency above 80 lm/W before judging an exterior pier mount lantern. Lumens measure light output, while watts measure electricity use. A 12-watt fixture producing 1,000 lumens reaches about 83 lm/W. The U.S. Department of Energy’s 2023 Solid-State Lighting R&D Opportunities report records laboratory LED efficacy above 200 lm/W, but complete outdoor fixtures perform lower. Heat, lenses, drivers, and housing design reduce real-world efficiency. Ask for tested fixture data, not only LED chip claims.

Photocell or timer compatibility matters at the driveway gate. A photocell can switch the lantern on at dusk and off at dawn. A timer can limit operation after midnight, reducing unnecessary consumption. The U.S. Department of Energy reports that LED lighting can use at least 75% less energy than incandescent lighting and last substantially longer. Check whether the lantern supports external photocells, astronomical timers, or both. Confirm voltage, wiring access, and minimum load requirements before installation.

Look for steady light near 3,000K to 4,000K, especially beside a dark walkway. Excessive brightness can create glare instead of safer visibility. I have seen attractive fixtures cast sharp shadows when their optics were poorly matched. That detail is easy to miss. Cold weather, rain, and insects may also affect sensor response. The International Energy Agency continues to identify efficient lighting as an important electricity-saving opportunity, but efficiency ratings alone cannot describe nighttime performance. Test the sensor location carefully.

How to Choose Exterior Pier Mount Lanterns?

Compare typical lighting efficacies for exterior pier-mount lantern configurations. Select LED products rated above 80 lm/W and verify that the fixture supports either a photocell, a timer, or both.

Reference values represent common technology ranges: incandescent lamps typically deliver about 12–17 lm/W, CFL lamps about 50–70 lm/W, and efficient LED systems about 80–120 lm/W. Compatibility should always be confirmed with the fixture specifications.

FAQS

How many lumens suit a typical residential entryway?

Start with 800–1,500 total lumens. A narrow porch may need about 800 lumens. Wider entrances or deep porches may need 1,200–1,500 lumens.

What affects the required brightness?

Mounting height, paved area, wall color, and nearby lighting all matter. Dark stone absorbs more light than pale walls. Tree shadows can also reduce useful brightness.

How can glare be reduced near steps and locks?

Aim the beam toward the entrance, steps, and lock. Avoid directing light toward drivers or nearby homes. Excessive glare can hide stair edges.

Which color temperature works well outdoors?

Warm white light around 2700–3000K makes brick and wood look natural. Light from 3000K to 4000K can suit darker walkways. Personal preference still matters.

How can brightness be checked before finalizing installation?

Inspect the lantern after sunset. Walk toward the door from the sidewalk. If your eyes squint, reduce brightness or improve shielding. Check again in winter.

What LED efficiency should an exterior lantern provide?

Look for efficiency above 80 lumens per watt. A 12-watt fixture producing 1,000 lumens reaches about 83 lumens per watt. Complete fixtures usually perform below laboratory LED figures.

Why should fixture data matter more than LED chip claims?

Lenses, heat, drivers, and housing design reduce real output. Ask for tested fixture performance. Lumens may decline with dirty glass and aging components.

Should the lantern support a photocell or timer?

A photocell can switch the light on at dusk and off at dawn. A timer can stop operation after midnight. Confirm voltage, wiring access, and minimum load requirements.

What outdoor construction details deserve attention?

Choose sealed electrical areas and an appropriate outdoor rating. The housing should tolerate rain, dust, and seasonal temperature changes. Sensor response may change during cold weather, rain, or insect activity. I might overlook sensor placement. Test it carefully.

Conclusion

Choosing Exterior Pier Mount Lanterns starts with matching the fixture to the structure. Measure the pier’s width and select a lantern that occupies approximately 25–33% of that dimension to create balanced proportions without overwhelming the entrance. Because these fixtures are exposed to rain and moisture, choose wet-rated models that meet UL 1598 requirements and provide IP65 protection for dependable outdoor performance.

For comfortable visibility, select a warm color temperature between 2700K and 3000K, along with a CRI of 80 or higher to help colors appear natural. An output of roughly 800–1,500 lumens is typically suitable for balanced entryway illumination, though surrounding conditions may influence the final choice. To reduce energy use, look for LED efficiency above 80 lumens per watt and confirm compatibility with a photocell or timer. These features can provide consistent lighting while helping manage operating time and energy consumption.

Evelyn

Evelyn

Evelyn is a highly skilled marketing professional with a deep understanding of the company’s products, services, and customer needs. With a strong background in market research, content strategy, and business communication, Evelyn transforms complex product information into clear, practical, and......