
0%

A welcoming garden path should feel easy to follow, not like a runway. Landscape Path Lights can reveal stepping stones, soften dark corners, and help guests see changes in level after sunset. Yet a neat row of bright fixtures can create glare or flatten the garden’s natural character. Small choices matter: where each light sits, how far apart fixtures are placed, and whether the beam reaches the path or shines into someone’s eyes.

Choosing well starts with the site. Notice mature plants, wet spots, nearby windows, and the route people actually take. A light that looks balanced at noon may feel harsh beside a bedroom window at night. Consider a warm color tone, a shielded beam, and materials suited to local weather. Solar models can simplify installation, though shade and short winter days may reduce their output. Low-voltage systems offer more consistent control, but need suitable wiring and careful placement. Check the manufacturer’s weather rating and follow its installation guidance.

There is no perfect layout for every yard. Sometimes a fixture needs moving after the first dark evening; that is useful feedback, not failure. The ten tips ahead explain how to compare brightness, spacing, power sources, durability, and style without overlooking practical details. The goal is simple: a path that feels safe and calm, with enough light to guide each step—and no more than the garden needs.
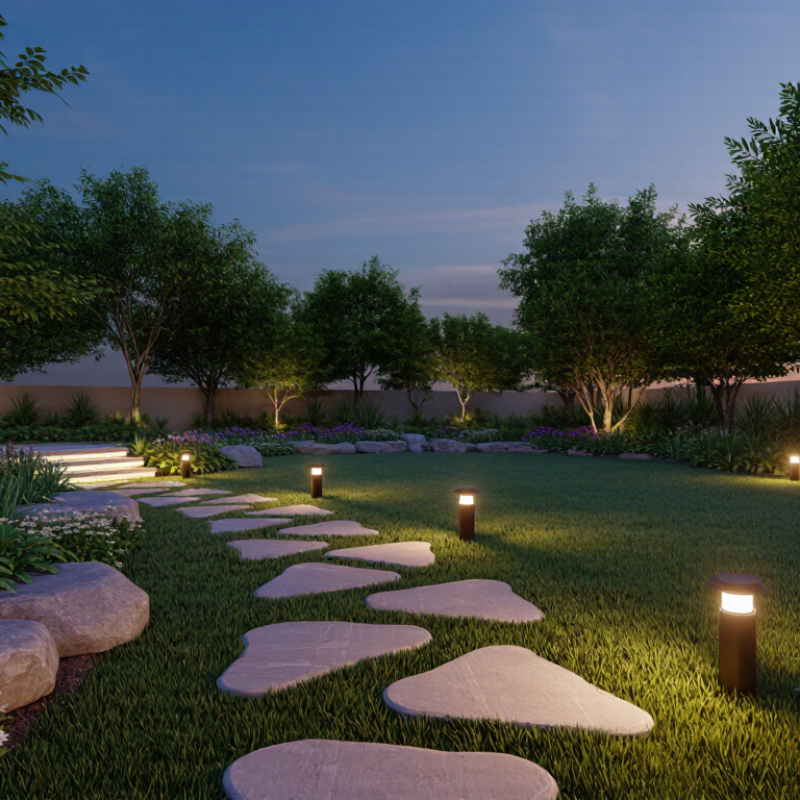
10 Tips for Choosing the Best Landscape Path Lights

Define Your Path Lighting Needs and Outdoor Layout

Good path lighting starts with the route, not the fixture. Walk the property after sunset and mark every turn, step, slope, and uneven surface. Note where people pause, carry groceries, or approach a doorway. A simple sketch can reveal dark gaps that daytime planning misses. Measure the path length and width, then record nearby trees, walls, beds, and drainage areas. These details shape placement and prevent a scattered row of lights.

Decide what the lighting must do. Safety may require clearer illumination at steps, while a garden path may need softer guidance. Keep light away from eye level, bedroom windows, and neighboring properties. Low-glare fixtures with shielded beams usually feel more comfortable. Space them according to the path width and brightness, not a rigid pattern. Uneven spacing can look natural, but random spacing often creates confusing shadows. Check cable routes, ground conditions, weather exposure, and local electrical requirements before installation. A qualified electrician should handle connections when the system involves mains power.

Experience has taught me to test the layout before digging. Place temporary lights along the route and view them from both directions. Look for glare, dark steps, and shadows behind shrubs. I once spaced lights too closely near a bend. It looked elegant on paper. At night, the area felt overlit and busy. Moving two fixtures solved part of it, though the planting still blocked one beam. That small mistake reinforced an important point: the best plan may need revision after sunset. Leave room to adjust positions as plants grow and outdoor use changes.

Compare Light Types, Brightness, Color, and Beam Coverage

10 Tips for Choosing the Best Landscape Path Lights

Tip 1: Compare the light source before comparing fixtures. Integrated LED units usually provide efficient, consistent output. The U.S. Department of Energy reports that LEDs use at least 75% less energy than incandescent lighting. They can also last up to 25 times longer. Replaceable lamps offer easier maintenance, while solar fixtures depend heavily on sunlight and battery quality. I have seen attractive solar lights become dim after several cloudy days.

Tip 2: Judge brightness by lumens, not appearance alone. A path light producing 100 to 300 lumens often suits residential walkways, but spacing changes the result. IES guidance stresses that uniform illumination matters more than isolated brightness. Place fixtures with overlapping pools of light. Avoid bright spots beside dark gaps. Tip 3: Check the beam angle. Narrow beams create dramatic accents but can leave steps poorly covered. Wider beams spread light across paving and planting beds. Tip 4: Choose warm color carefully. Around 2700K to 3000K usually makes stone, wood, and foliage look comfortable. Cooler light can reveal detail, but it may feel harsh at eye level.

Tip 5: Test one fixture at night. A product photograph cannot show glare, shadows, or actual beam reach. Tip 6: Shield the lamp from direct view. The Illuminating Engineering Society recommends controlling glare for visual comfort and safer movement. Tip 7: Measure spacing on site. My own first layouts were too symmetrical, and some corners stayed dark. That was a useful mistake. Small changes in height, lens direction, and beam overlap can improve coverage more than simply adding fixtures.

10 Tips for Choosing the Best Landscape Path Lights - Compare Light Types, Brightness, Color, and Beam Coverage

Typical specifications vary by product and installation. Beam coverage is an approximate ground area and depends on fixture height, optics, spacing, and surrounding conditions.

Tip What to Compare Typical Range or Feature Best For Practical Buying Check
1. Choose the power type Solar, low-voltage wired, or line-voltage fixtures Solar fixtures use an integrated panel; low-voltage systems commonly operate at 12 V; line-voltage systems use household mains power. Solar: areas with good sun and simple installation. Low-voltage: consistent, controllable lighting. Line voltage: installations designed for mains-powered outdoor fixtures. Check sunlight exposure, cable-routing needs, transformer compatibility, and local electrical requirements.
2. Match brightness to the task Light output in lumens Many path lights provide roughly 10–200 lumens per fixture, depending on type and intended use. Lower output for subtle garden accents; higher output for brighter wayfinding or wider spacing. Compare lumen ratings rather than judging brightness from wattage alone. Avoid excessive glare along walkways.
3. Pick a comfortable color Correlated color temperature (CCT) About 2700–3000 K is warm white; around 3500–4000 K appears neutral white; 5000 K and above appears cooler. Warm white often suits gardens and traditional landscapes; neutral white can make route edges and steps easier to distinguish. Use a consistent color temperature across fixtures in the same view to avoid a patchy appearance.
4. Check beam direction and spread Beam angle, lens, and shield design Narrow optics concentrate light; wider optics spread it over more ground. A shield or louver can help limit sideways glare. Directional beams for borders or specific features; broad, shielded beams for general path illumination. Look for a beam diagram or ground-level coverage information. Beam angle alone does not determine usable coverage.
5. Plan fixture spacing Spacing relative to mounting height and beam spread Spacing is site-specific; overlapping pools of light generally create more even coverage than widely separated fixtures. Curved paths, steps, and changes in level benefit from carefully placed overlapping light. Mock up positions after dark where possible. Check for dark gaps, hot spots, and direct views of the light source.
6. Look for outdoor protection Ingress protection (IP) rating and construction IP ratings indicate protection against solids and water; the required rating depends on exposure and installation location. Exposed paths, sprinkler zones, and locations subject to rain or garden maintenance. Verify the fixture is rated for outdoor use and follow the manufacturer's guidance for wet locations and installation.
7. Consider solar performance Panel exposure, battery, and operating time Solar runtime varies with panel size, battery condition, season, shade, and daily sunlight. Small gardens or paths where wiring is impractical and the panel can receive direct sunlight. Check whether the panel is integrated or remote, how the battery is replaced, and how performance changes in winter.
8. Check dimming and controls Dimming, timers, photocells, and motion sensors Control options differ; some systems support schedules or dimming, while basic fixtures may offer only automatic dusk-to-dawn operation. Homes needing scheduled lighting, reduced late-night brightness, or automatic operation. Confirm that controls are compatible with the fixture, transformer, and any existing outdoor lighting system.
9. Choose durable materials Housing, finish, lens, and replaceable parts Outdoor fixtures may use aluminum, stainless steel, resin, or other weather-resistant materials; durability depends on design and finish. Coastal, wet, or high-traffic locations where corrosion, impact, or maintenance may be concerns. Review corrosion guidance, lens material, warranty terms, and availability of replacement batteries or light modules.
10. Test the result at night Uniformity, glare, shadows, and visibility Perceived coverage changes with surface color, planting, fixture height, and nearby ambient light. Every installation, especially paths with steps, turns, uneven surfaces, or nearby windows. After installation, walk the route at night and adjust aiming or spacing before permanently securing fixtures.

Evaluate Power Sources, Energy Efficiency, and Installation Options

Choosing path lights starts with an honest look at the power supply and shade. Solar fixtures avoid trenching, but their output can fall sharply under dense trees or during short winter days. Wired low-voltage systems deliver steadier light and suit long paths, though they need careful cable routing and a correctly sized transformer. Battery-powered models fit small gardens, but check replacement costs and cold-weather performance. Inspect the path after dark, then mark each fixture before digging.

The U.S. Department of Energy’s Energy Saver guidance reports that residential LEDs use at least 75% less energy and last up to 25 times longer than incandescent lighting. Compare total system use, not bulb wattage alone. For solar lights, check panel exposure and battery capacity; a shaded panel may not recharge enough for the full night. For wired installations, test beam spacing with temporary stakes first. Leave room to adjust. Glare is easy to underestimate. An uneven pool of light may be preferable to overlighting a narrow walkway, and that trade-off is worth reviewing after a rainy evening.

Check Weather Resistance, Materials, Safety, and Maintenance

Choosing the best landscape path lights starts with weather resistance, not appearance. Check the IP rating under IEC 60529. IP65 resists dust and water jets, while IP67 allows temporary immersion. For exposed walkways, IP65 is a practical minimum. Near sprinklers or flood-prone soil, IP67 offers more protection. Test it outdoors.

Materials affect service life. Powder-coated aluminum resists corrosion, while stainless steel handles moisture better but may still stain near saltwater. Avoid thin plastic housings that become brittle under strong sunlight. The U.S. Department of Energy reports that LED lighting uses at least 75% less energy and can last up to 25 times longer than incandescent lighting. However, poor seals can defeat those efficiency gains. Small details matter.

Safety deserves careful inspection. Use low-voltage fixtures with outdoor-rated cables, sealed connectors, and a properly protected transformer. NFPA 70, the National Electrical Code, requires ground-fault protection for many outdoor electrical applications, though local requirements may differ. Keep cables below mulch depth and away from sharp edging. A maintenance check every few months should remove soil, trim plants, and inspect cracked lenses. I have found that neglected connections often fail before the lamp itself. That is easy to underestimate. Choose replaceable components when possible, because a lower purchase price may create more waste and labor later. Be honest about the site: a beautiful fixture is still a poor choice if water collects around its base.

Match Fixture Design With Your Landscape and Set a Practical Budget

Choose path lights that belong in your landscape. A simple black stake can disappear beside dark mulch, while a bronze finish may echo nearby planters or railings. For a natural garden, fixtures with modest shapes often feel less intrusive than oversized lanterns. Check the light in daylight, too. It will be visible long before dusk.

Tip: Set a practical budget before shopping. Include the fixtures, compatible bulbs, wiring or low-voltage components, and any installation work. Prices can rise when a path needs extra cable or difficult digging. I’ve found it helpful to price the whole route, not just one appealing light. Leave a small cushion for replacements or unexpected materials.

Spacing matters. Place a few sample fixtures along the path, then view them at night before buying the full set. Look for dark gaps, glare at eye level, and light spilling onto plants. You may need fewer fixtures than expected—or one more near a step. That part is easy to misjudge. Aim for a steady, comfortable guide rather than a bright runway.

Landscape Light Output by Fixture Type

Typical planning ranges in lumens. Choose output to suit the fixture’s purpose, viewing distance, and surrounding conditions; actual products vary.

Path lights generally use modest output for wayfinding, while floodlights provide broader, brighter coverage. Use these ranges as a starting point when matching fixture design to your landscape and setting a practical budget.

FAQS

Which light source should I choose for landscape path lights?

Integrated LED lights usually use less energy and provide consistent brightness. They can last much longer than incandescent lamps. Replaceable lamps simplify future maintenance. Solar lights may become dim after several cloudy days.

How many lumens are suitable for a residential walkway?

A path light producing 100 to 300 lumens often works well. Spacing changes the final effect. Aim for overlapping pools of light, not isolated bright spots.

Why does beam angle matter?

Narrow beams create dramatic accents but may leave steps partly dark. Wider beams spread light across paving and planting beds. Coverage matters more than intensity alone.

What color temperature feels comfortable outdoors?

Warm light around 2700K to 3000K usually suits stone, wood, and foliage. Cooler light reveals more detail. However, it may feel harsh at eye level.

Should I test a path light before buying several?

Yes. Test one fixture after dark. Check its glare, shadows, and beam reach. Product photographs cannot show those details accurately.

How can I reduce glare along a walkway?

Use fixtures that shield the lamp from direct view. Avoid placing bright sources at eye level. Comfortable light helps people see steps without staring into the fixture.

How should path light spacing be planned?

Place sample fixtures along the actual path before buying the full set. Look for dark gaps and light spilling onto plants. Small changes in height, direction, and overlap can improve coverage.

How should fixture style and budget match the landscape?

Choose modest shapes that suit nearby mulch, planters, railings, or paving. Check the fixture during daylight because it remains visible then. Budget for fixtures, lamps, wiring, installation, and replacements. A small cushion helps. Overspending on one attractive light can distort the whole plan.

Conclusion

Choosing the right Landscape Path Lights begins with understanding your outdoor layout, walkway length, and the areas that need the most visibility. Consider whether you want to highlight garden features, guide guests safely, or create a warm atmosphere. Compare different light types, brightness levels, color temperatures, and beam coverage to find a balanced look that provides useful illumination without excessive glare. Also evaluate power sources, such as wired or solar options, along with energy efficiency and installation requirements.

Durability is equally important for outdoor lighting. Select fixtures made from weather-resistant materials that can handle moisture, temperature changes, and regular exposure to the elements. Check safety features, maintenance needs, and the ease of replacing bulbs or cleaning the fixtures. Finally, choose a design that complements your home and landscape style, whether modern, classic, or natural. Set a practical budget that includes installation and long-term operating costs, helping you create an attractive, dependable, and well-planned pathway lighting system.

Amelia

Amelia

Amelia is a professional marketing specialist with a strong understanding of the company’s products, services, and customer-focused approach. With experience in market research, content strategy, and digital communication, she transforms complex product information into clear, practical, and......